


A 2021 survey by Statista highlighted that 38 percent of software programmers across the globe acknowledge React native as the most helpful framework for developing cross-platform apps. Provided the number of functionalities that the framework can offer, it can also be referred to as the future app-building technology. This blog will take you on the journey of deploying React Native applications to the Expo app store.
Let’s first discuss what App deployment is. App deployment is the process of publishing an app to a definite app store. It also lets developers make a date-wise list of the apps in the app store’s dashboard. So, if you are up for building a react native app, you should also know how to deploy it to the correct app store.
You may be thinking about why I used the word ‘correct’ in the previous line. It is so that since it is an expo app, I have to deploy it to the expo app store. Had it been an android app or iOS app, it would have been necessary to deploy it to the Google Play Store or Apple App store respectively. Also, deploying it to the Expo App store is much easier and only involves four steps. Top react native developers go through this step to allow their users to interact with the app.
What is known as the Expo App store? It is a kind of store where apps are published. It is the same as that of the Apple app store and Google Play store. Such an app store is based on Expo. Most of the developers working for react native app development companies deploy their apps to the Expo app store to ensure that their built project is working properly.
Terms you may encounter in the following steps
-
Splash screen– It is the screen displayed at the time of app loading. You can also refer to it as the app opening screen.
-
Slug– It is located in the root directory of the built app or project. Slug is defined as the name given to the built app in the URL of the same.
-
App icon– It is the small icon or logo set for the app that users see.
-
Name– It is simply the app name.
Without delaying much, let’s start with the steps.
Step 1: Creating an account at expo.dev
-
For deploying your app to the Expo app store, you should have an account @expo.dev.
-
Go to expo.dev/signup and put all the details to sign up for the account. If you already have an account, don’t need to worry. Simply login.
Step 2: Prerequisites to consider
-
This goes without saying. You won’t be able to deploy the app to the store if you don’t have a react native expo app.
-
Build one. Don’t fret if you are struggling to build such an app. Follow the steps shown in the tutorial blog to get a detailed understanding of how to create and run an Expo app from scratch.
-
Go to the app.js file of your project. Here, I will go to the app.js file of the app (my-project) that I have built with the expo. Have a look at image 1.
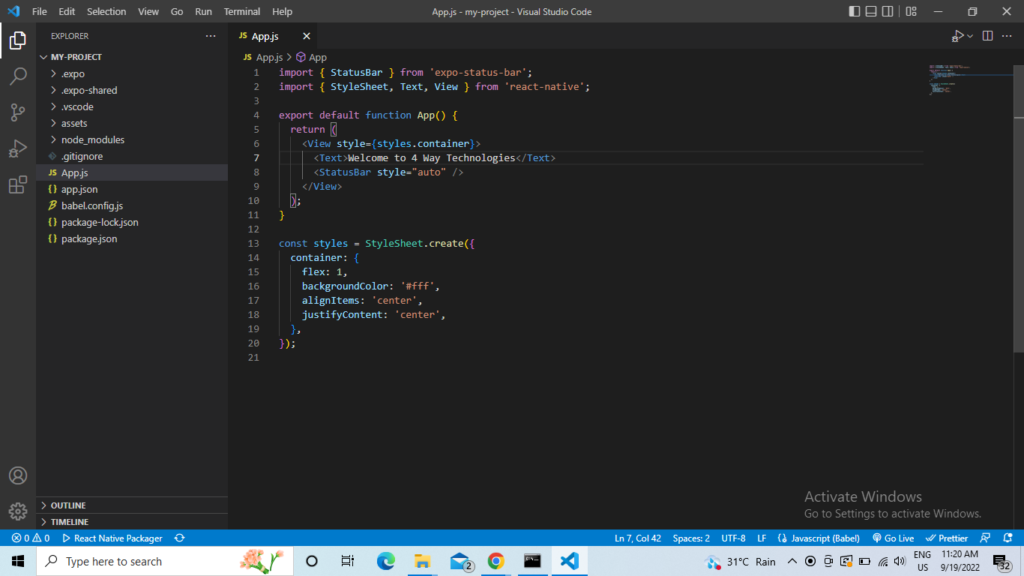
Image 1
-
Follow the steps with your project as I am doing in this project. Open the app.json segment of the root directory. Change the section of “name” and “slug” as per your choice. Look at image 2, I have inserted “innovative-app” as the slug and “innovative app” as the name.
-
You have to use a dash between the words used in the ‘slug’ section.
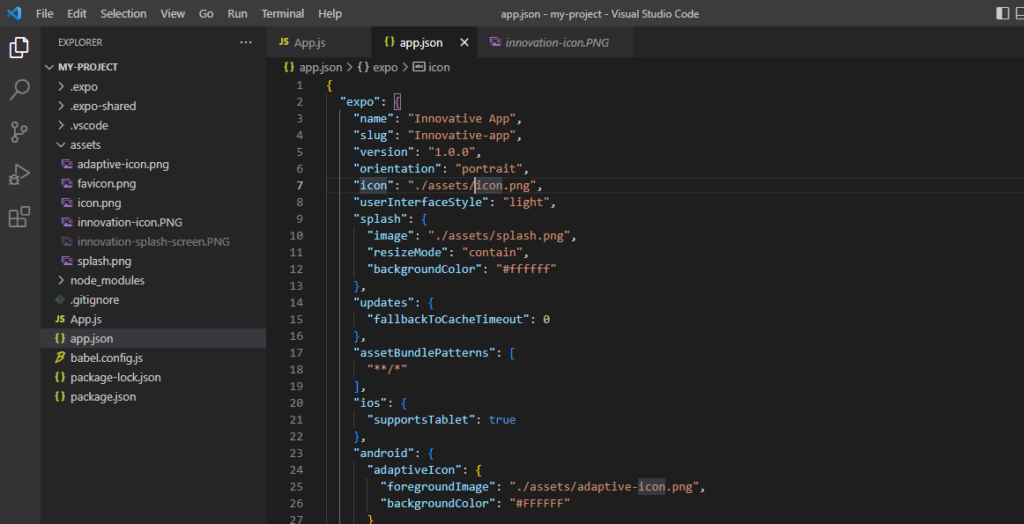
Image 2
-
Open the assets file. Based on your needs, change all the icons provided as a default.
-
You have to download two images. One for the app icon and the other one for the display splash screen.
-
Note that you have to insert a square or the same dimensional image as your app icon and splash screen.
-
Save directly in the asset segment of the app on your local disk.
-
Look at image 3.
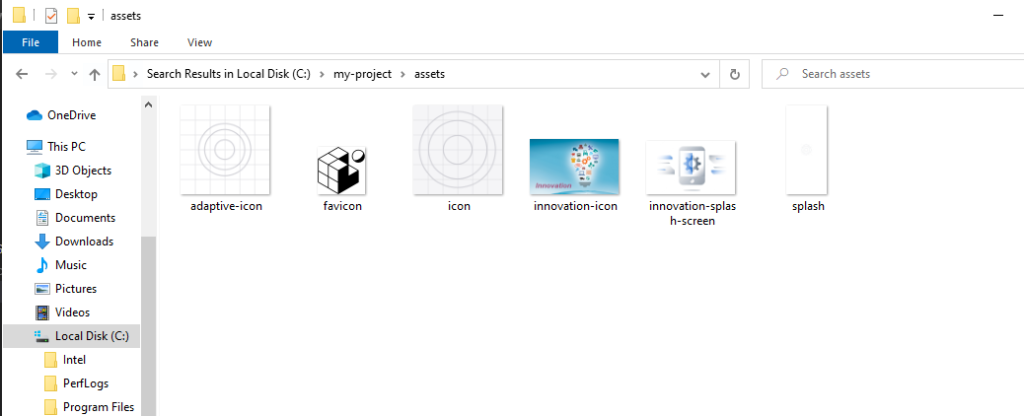
Image 3
-
Delete the default icons that will not be required.
-
Save the steps as you proceed or else it will not be displayed on your emulators or running Android device.
-
In the app.json file, add some descriptions about the app. It will be visible to the users as they open it.
-
Follow image 4 to understand how I have added “description” segment after “slug”
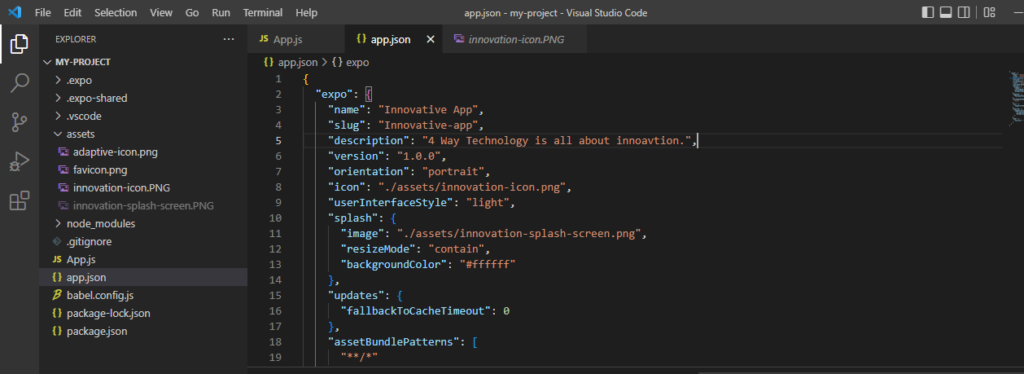
Image 4
-
All the prerequisite steps have been covered.
Let’s start with the main app deployment process.
Step 3: Deployment of ‘Innovative App’
-
Install the Expo-CLI in your development system. You can also install it by passing npm install -g expo-cli on the command prompt. Make sure to run the cmd as administrator.
-
Now you have to run the expo login in the cmd to log in to your expo account.
-
Look at image 5, it says I have logged in as tanusree247 after providing the email-id and password.
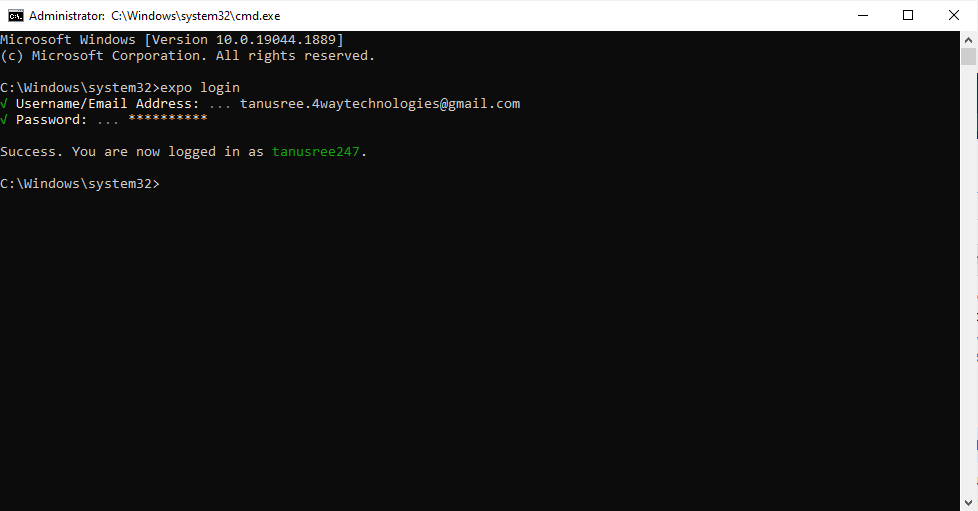
Login
Image 5
-
Open the cmd from your app folder and run expo publish to publish the same.
Step 4: Final checking
-
This step will ensure you are done with the app deployment process.
-
Open the Expo account and check the left panel to see your app get listed in the dashboard.
-
Look at image 6, my ‘Innovative App’ is published.
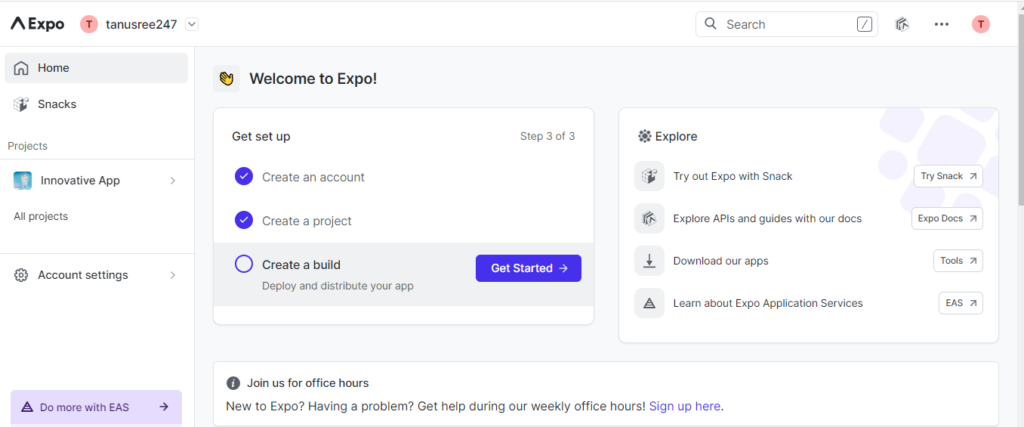
Image 6
-
To get the overview, select the app.
-
It also allows you to enable the visibility of the built application on your developer profile. For this, enable the “public” mode in settings.
-
Go to the Profile located in your name icon. Here, you can see all the apps you have published to date.
And you are done with the entire app deployment steps.
Summary
From the steps explained in the article, you might have understood how significant it is to deploy an app. You don’t have to track manually all the build react native apps. You can simply open your expo account and track all the apps. It also lets the users interact with these apps. So, make sure that you have deployed all the react native apps you have built.


Add Comment